
Ricotta Cavatelli
I didn’t grow up making this particular shape of pasta, despite the fact that it’s my Dad’s favorite. But I learned! It’s a really easy and fun shape to make, especially because you can be as creative or as simple with it as you want!
The dough is actually the same as I would use to make my ricotta gnocchi, you just roll out a different shape! But on the basic end, cavatelli are even easier to make than gnocchi because they require nothing more than your thumb and a wood board! Yea, that’s it. But you can play from there. Anything textured in the kitchen can be used to create fun patterns on the pasta. You could still use a fork, like gnocchi, or a slotted spoon, a sieve, seriously, get creative! I’ll show you exactly how to roll them in the video below. From there, you get to add your favorite sauce. In our house a nice ragu (meat sauce) is the usual answer. Cavatelli lend themselves to something a bit chunky because of that scoop shape they have. Then of course, there’s the classic dish with broccoli rabe!
I think this is one of those shapes that you’ll be excited to make and use in a variety of recipes. Especially because once formed, you can easily freeze the cavatelli and save them for later use. Making it well worth the Sunday afternoon project to roll out a large portion of them! I hope you all enjoy learning to make this shape and try making it at home with family! Buon appetito!
YOU MAY ALSO LIKE
RICOTTA GNOCCHI
CAVATELLI con BROCCOLI RABE
BOLOGNESE SAUCE MARINARA SAUCE
SIMPLE SUMMER SAUCE

Ricotta Cavatelli
Serves 4
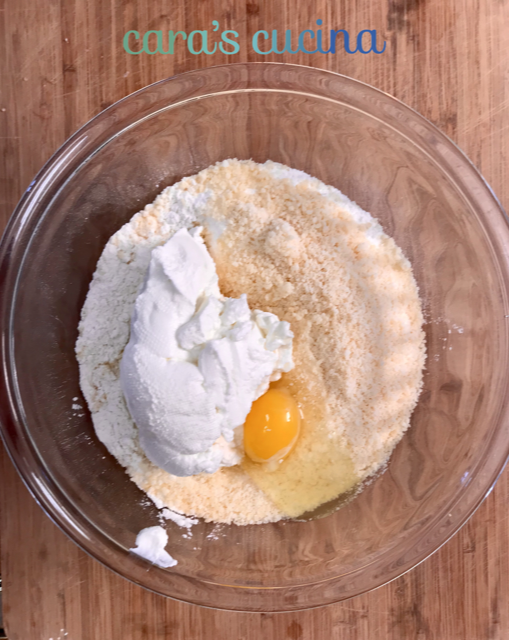
1 15oz. container fresh ricotta cheese
1 C. parmesan cheese, grated
1 egg
pinch of salt
2 C. Caputo pasta flour
Place the ricotta in a strainer over a bowl and allow to drain for 30 minutes, up to 1 hour.
In a large bowl, combine all ingredients, mix with your hand or a wooden spoon until it all comes together as dough.
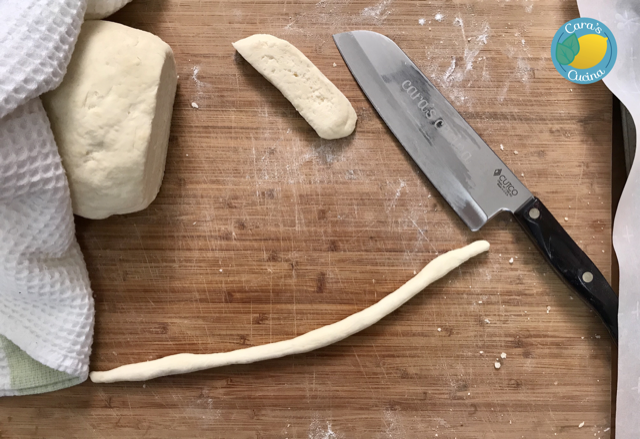
Dust a work area with flour and transfer the dough to the surface. Continue kneading it until a soft, smooth dough comes together. Cover with a dish towel and allow to rest while you clean your hands and prepare a tray with more flour to put your finished pasta on.
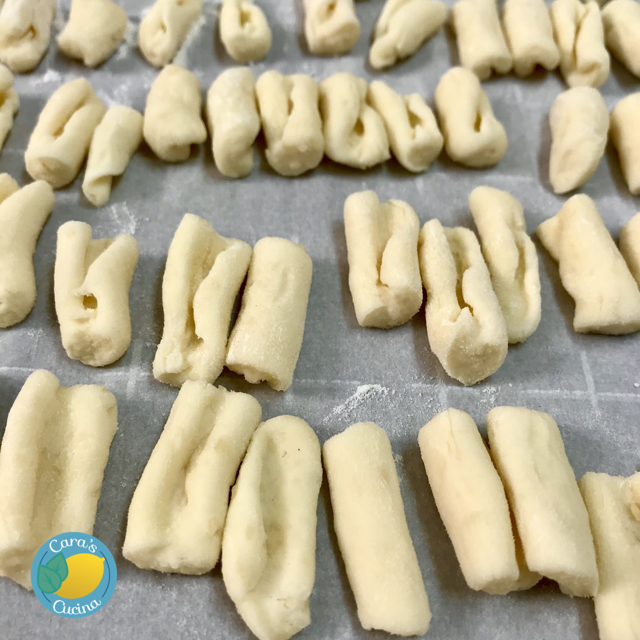
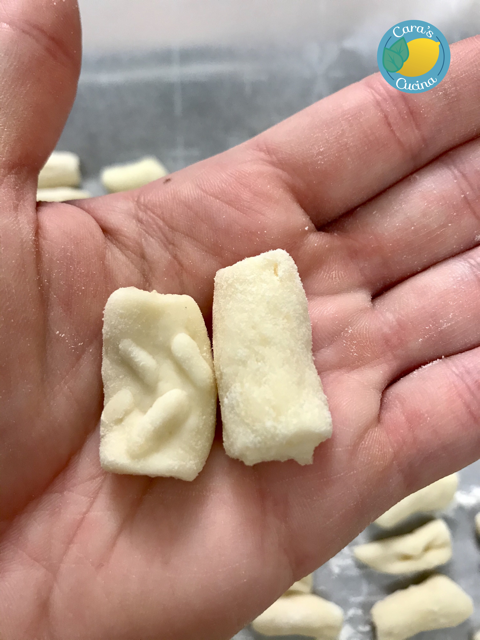
Use a sharp knife to cut off a small piece of the dough. Roll it into a thin snake, about the width of your pinky finger. Cut the snake into 1 inch pieces. Carefully use the side of your thumb to roll each piece against the work surface, creating a hollow, curved pasta shape. OR, use a textured item to roll the dough on to create different patterns in the pasta. Place the finished pieces on your prepared tray. Continue until all of the dough has been formed.
*At this point, you can place the tray of pasta in the freezer for 30 minutes, then transfer the frozen pasta to a zip baggie and store in the freezer for use later.
If cooking the pasta right away, leave the trays out at room temperature. Bring a large pot of salted water to a rolling boil. Toss the pasta in and as soon as it floats, it’s ready to be tossed with your favorite sauce!